Game 3 - Bretonnia - Richard - Meeting Engagement
Meeting engagement scenario is really interesting. First, you really don't know what is going to end up in reinforcements. So you have to be ready to adapt quickly, especially if that level 4 does not show up and you are going second :) Then the fancy deployment zones can throw you out of balance as armies can be really close to each other. After all it is only 12" between deployment zones. The good thing is, however, that you know if you are going first or second. At least against Bretonnians as when they prey you automatically get first turn.
Bretonnians are always a tough nut to crack as their armour and ward saves can deflect a lot of blows directed at them. They are also very fast. Let's see what Richard had in his force in particular:
Bretonnia - Army List
Lord, Knight's Vow, Sword of Strife, Enchanted Shield, Potion of Foolhardiness, Talisman of Luck, Virtue of Heroism
Prophetess, level 4, warhorse, Book of Asur, Mane of the Purebreed - Lore of the Beast
BSB, warhorse, Banner of Defence, Knight's Virtue, Virtue of Knightly Temper
Paladin, warhorse, shield, lance, Knight's Virtue, Gromril Great Helm
Paladin, warhorse, shield, lance, Knight's Virtue, Potion of Strength, Tress of Isolde
Paladin, warhorse, great weapon, Questing Vow, Dragon Helm, Dawnstone
Damsel, warhorse, level 1, Dispel Scroll - Lore of the Beast
12 Knights Errant, FC, Banner of Swiftness
6 Knights Errant, Standard, Musician
6 Knights of the Realm, Standard, Musician, Gleaming Pennant
9 Knights of the Realm, Standard, Musician, Warbanner
18 Bowmen, Braziers, Defensive Stakes
3 Pegasus Knights, Musician
1 Field Trebuchet
Magnificent Seven and the army of ... well not peasants for sure :) Now that is really, really tough. When I saw the list I was wondering where these characters are going to go as they have the potential of making each unit way more dangerous. And they can spread out evenly among them too.
The one thing I learned about Bretonnians is that they love their lance formation and that means they battle line is deep and narrow. That gives me the chance to outflank them and to block their advance in the centre at the same time. Also, because they are so tight they might not be able to wheel properly and once in motion lances are difficult to turn. Any swift reforms can be very cumbersome for the big units in particular.
I wanted to use these limitations to my advantage.
It was very interesting to see Beast magic with Prophetess and Damsel. There was a potential to get 2 wildforms per turn that would make the knights true beasts! (pun intended!). With book of Ashur that lady was difficult to stop and the fact that there is -1 to cast for cavalry when target of beast magic made it even more dangerous for me. You see, the weakness of the Bretonnian army is that the knights are S3 after the charge. But with so many characters and wildform that can be nicely balanced out. Not to mention about Savage Beast of Horrors!
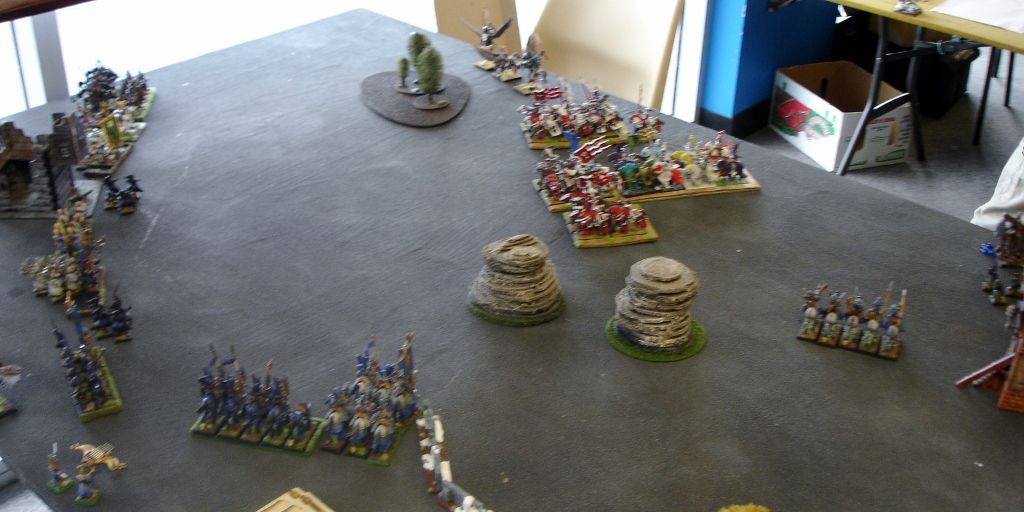
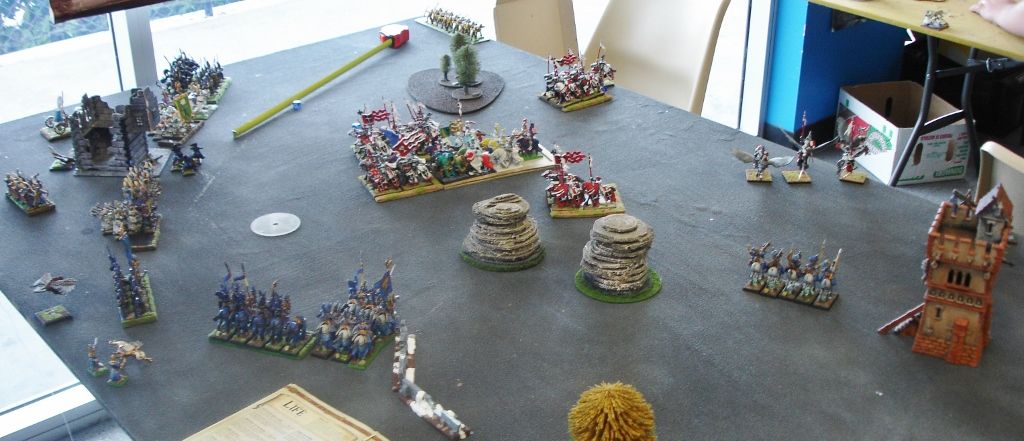
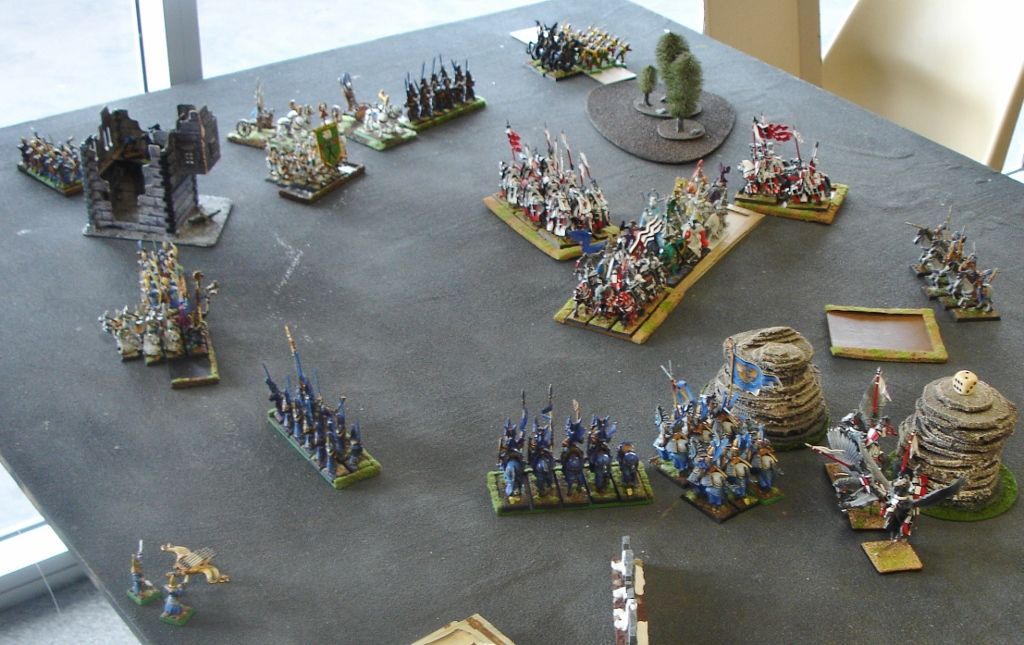
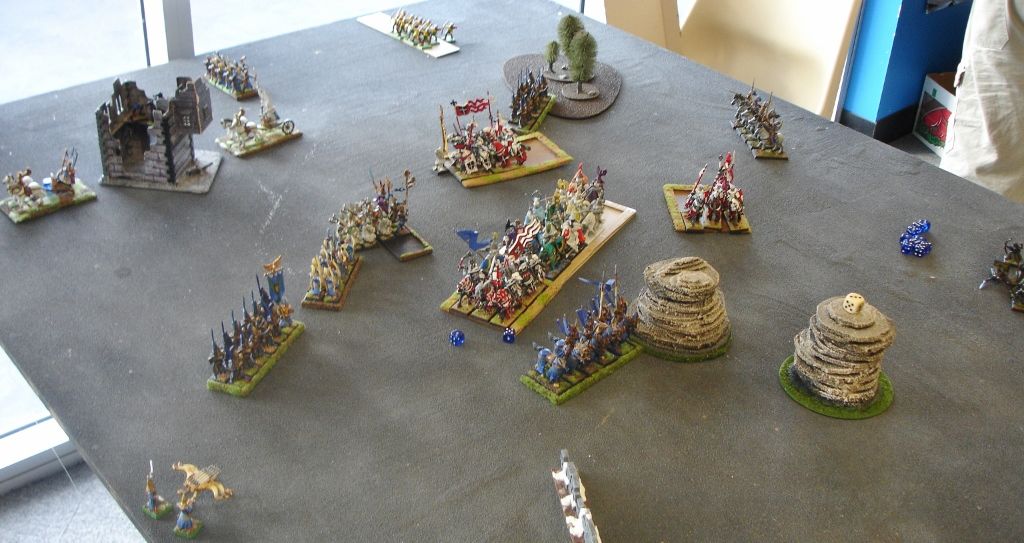
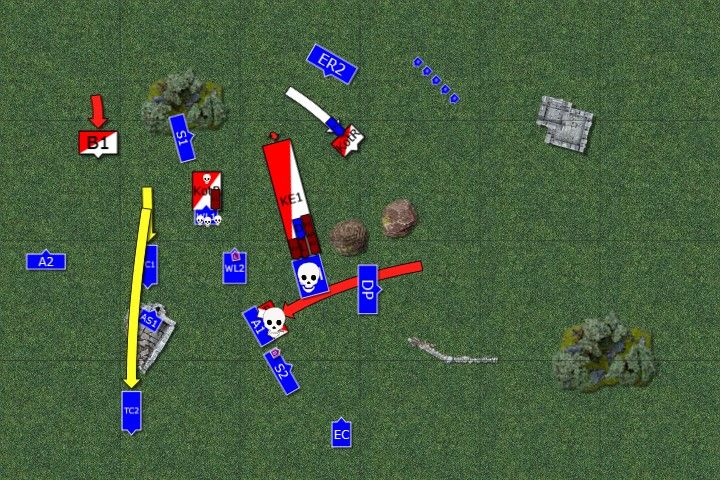
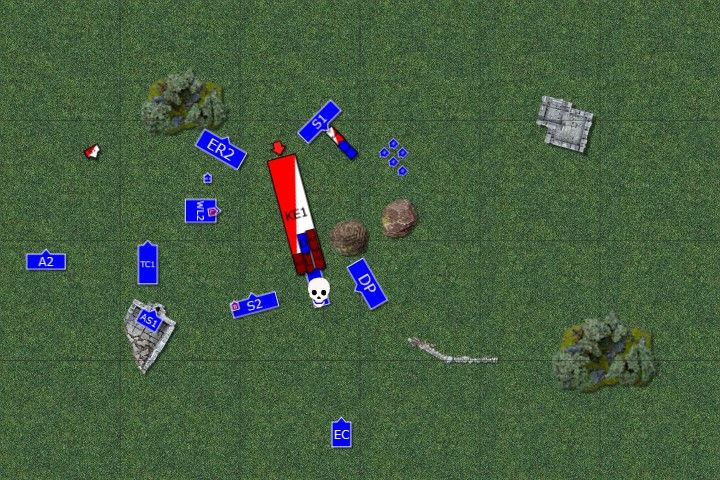
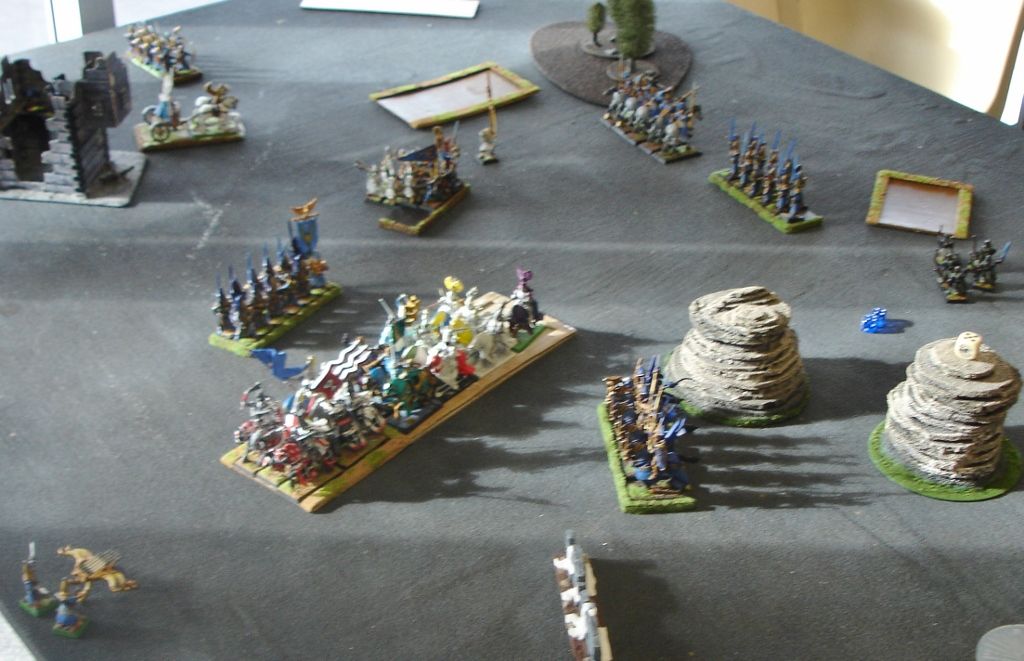
Deployment
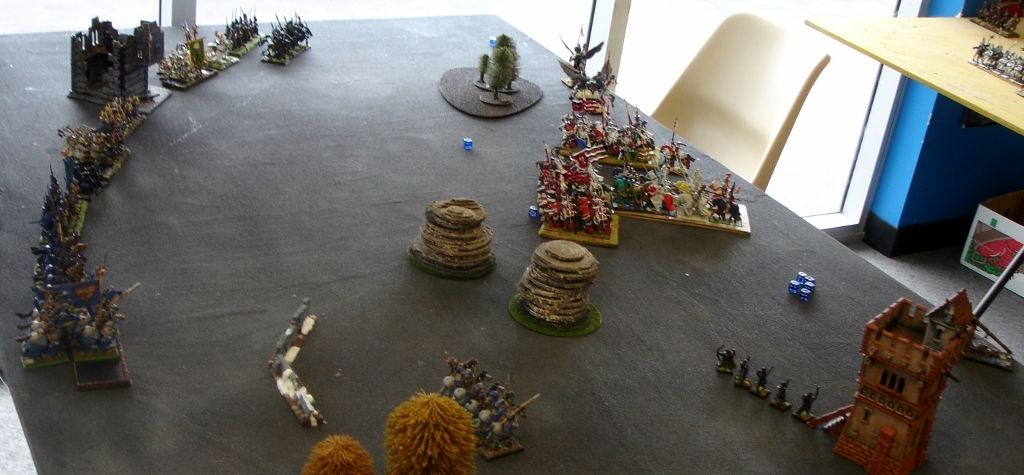 |
| Lances vs MSU - which is going to prevail? |
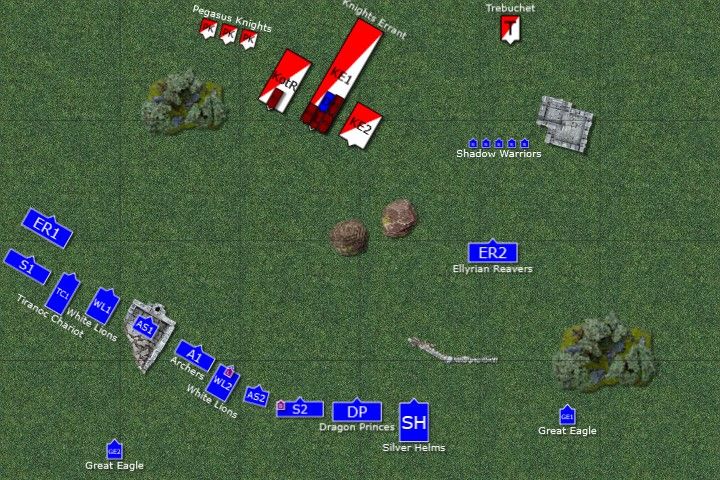 |
| Armies after vanguards - can you spot missing units? |
I had to deploy my entire army first and when rolling for reinforcements I got eagle claw, chariot and archers in reserves. A pity about eagle claw as it meant I lost a turn of shooting.
On the other hand, Richard's Prophetess and one unit of Knights were not present yet either. Well, at least she was not alone :) A unit of bowmen was late to the game too.
Bretonnian wizards had following spells:
Prophetess - Wyssan's Wildform, Penn's Impenetrable Pelt, The Curse of Anraheir, The Savage Beasts of Horrors
Damsel - Wyssan's Wildform
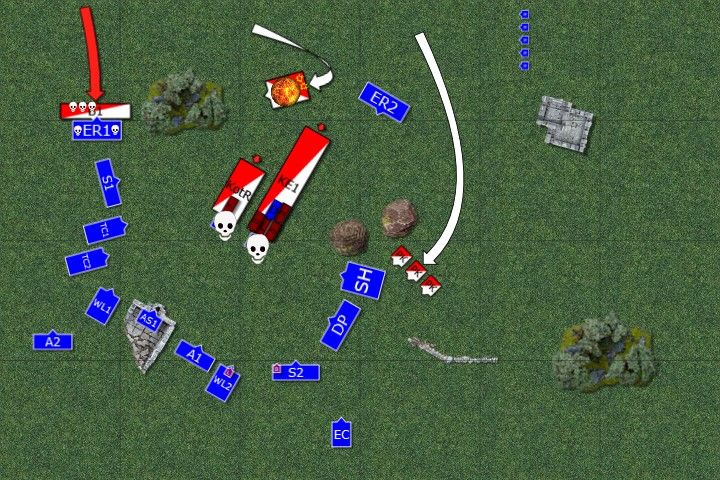
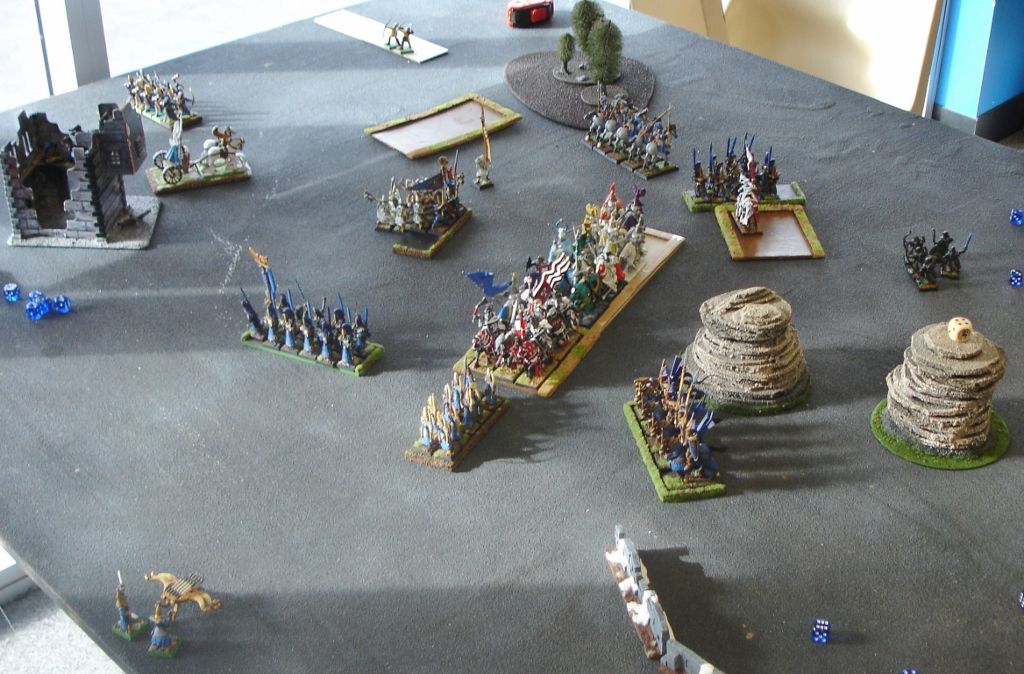
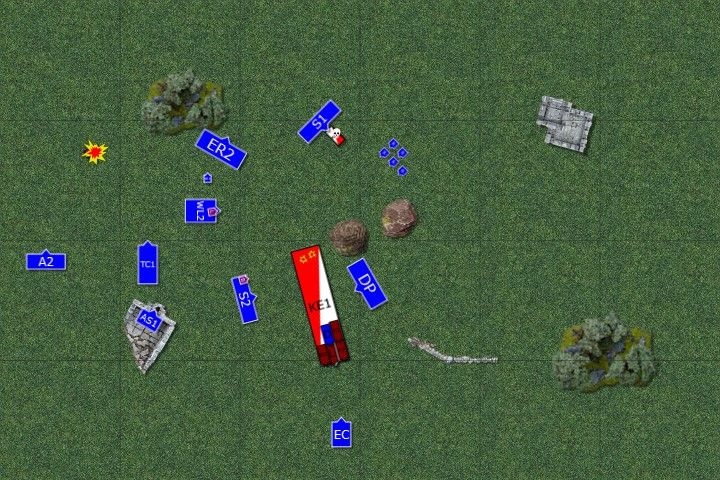
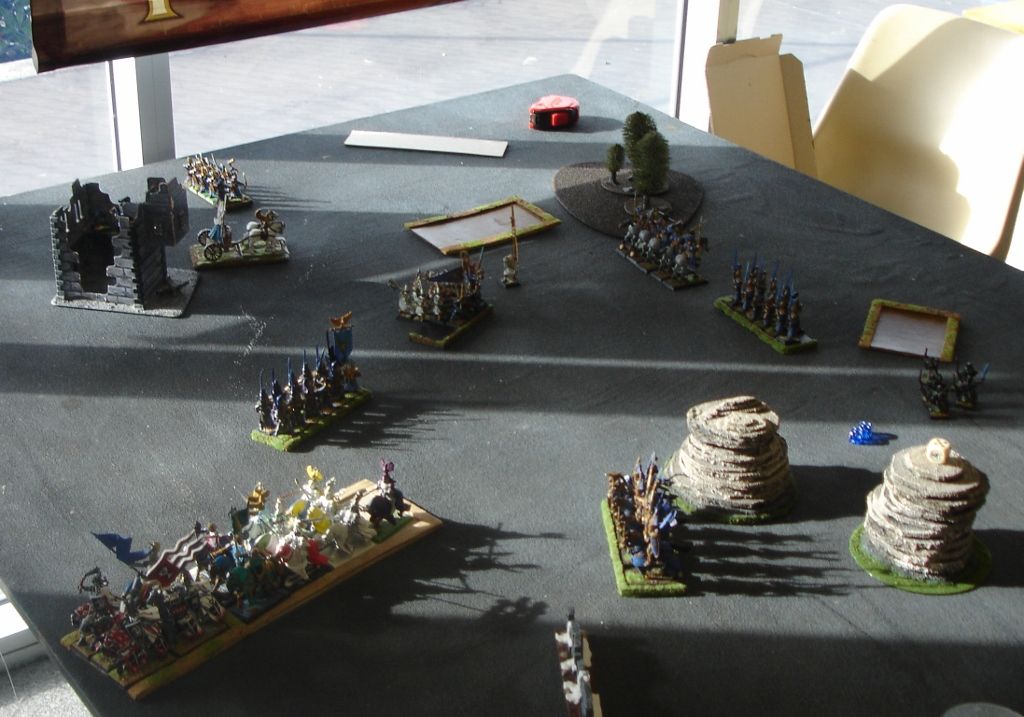
Outcasts - Turn 1
 |
| Trebuchet hunt |
 |
| Reinforcements arrive |
With enemy still far away Elves move cautiously. Only light troops on the right flank move at a double to hunt down the trebuchet crew before the war machine is going to cause trouble.
Shots are directed at the nearest unit of knights but their armour and devotion proves to be a good enough protection and only two of them are unhorsed. All reinforcements arrive too.
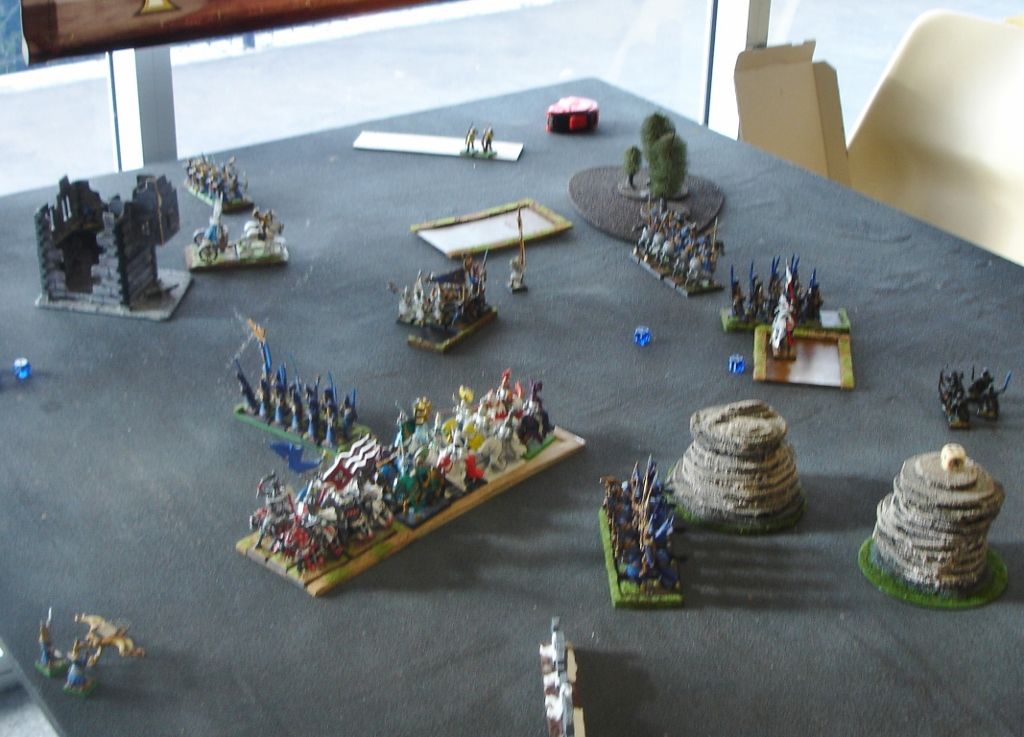
Bretonnia - Turn 1
 |
| Impetus knights gallop forward |
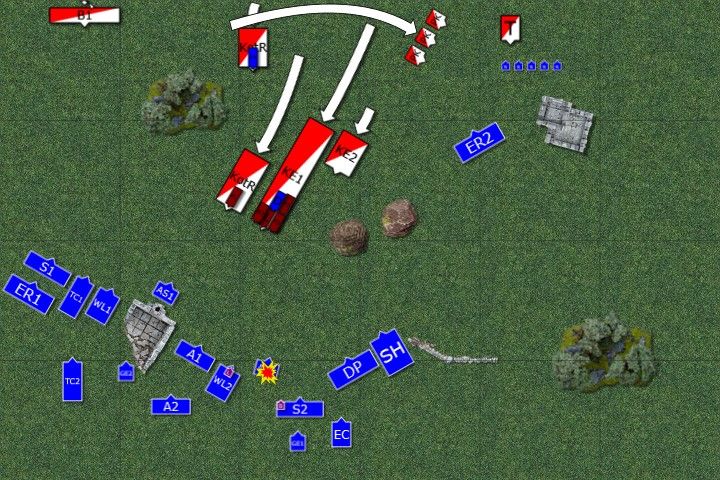 |
| Prepare to charge! |
Bretonnians spurred their horses and moved towards the Elves at a double. Their own reinforcements had to be quick to catch up. Pegasus Knights changed the sides and threatened Elven light troops.
The peasants operating the trebuchet moved fast and launched a huge boulder before they were attacked. They even managed to land it on the unsuspecting Sisters, who had no chance to escape the death from above.
Outcasts - Turn 2
 |
| It's a TRAP! :) |
 |
| The eagles have landed |
The eagles landed in front of the two most powerful units of the enemy and blocked their movement while the rest of the units manoeuvred to threaten the flanks of the enemy formation.
The shooting focused on the small knights errant unit and this time there were no survivors. Also Shadow Warriors made sure the trebuchet is not going to shoot again.
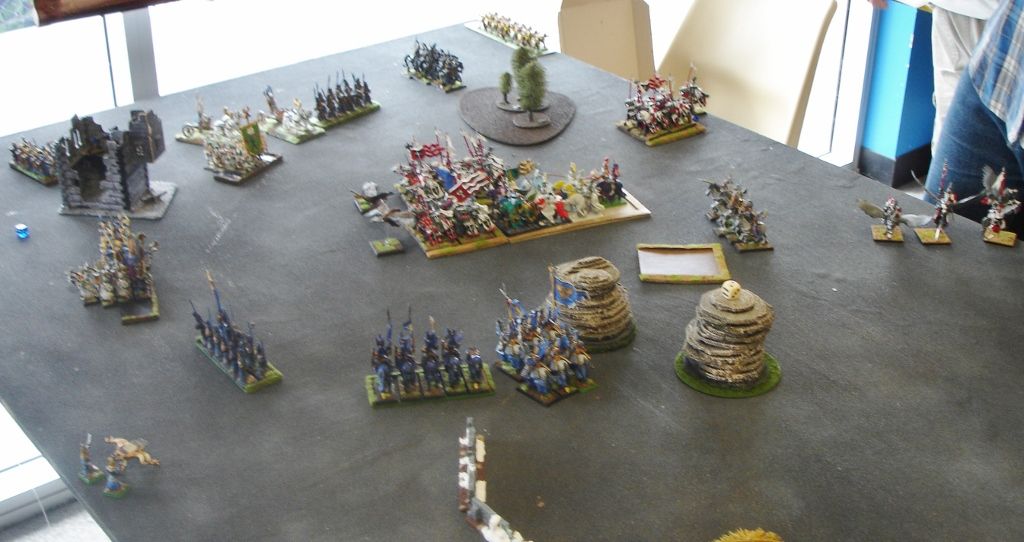
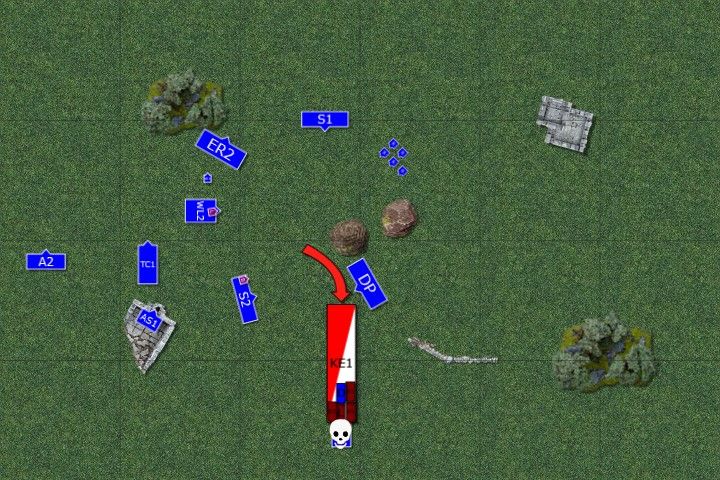
Bretonnia - Turn 2
 |
| Bretonnians charge! |
 |
| Even bowmen join the close combat |
Bretonnian Lord orders an attack and both eagles perish trampled under the hooves. Both regiments turn to respective flanks to face incoming attacks.
Even bowmen attack elven light troops that were too close and reavers are forced to hold to protect the flank.
Prophetess, trying to make up for her late arrival, casts her magic to infuse superhuman strength to the paladin leading Knights of the Realm to battle. Elven Loremaster is unable to dispel the irresistible magic but the feedback costs the life of the two of her bodyguards.
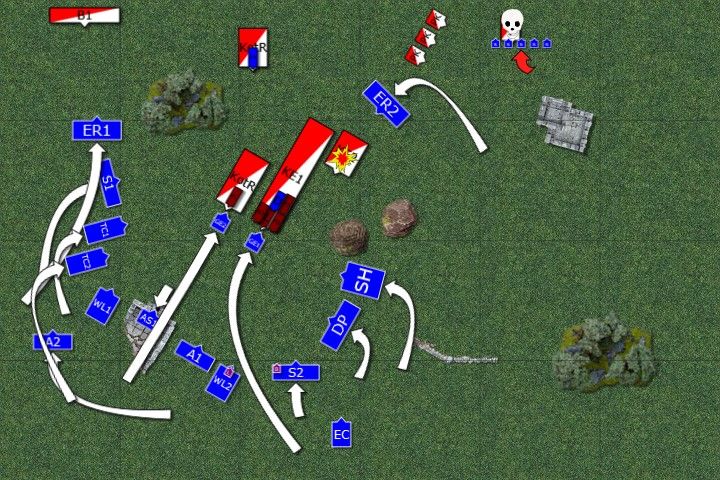
Outcasts - Turn 3
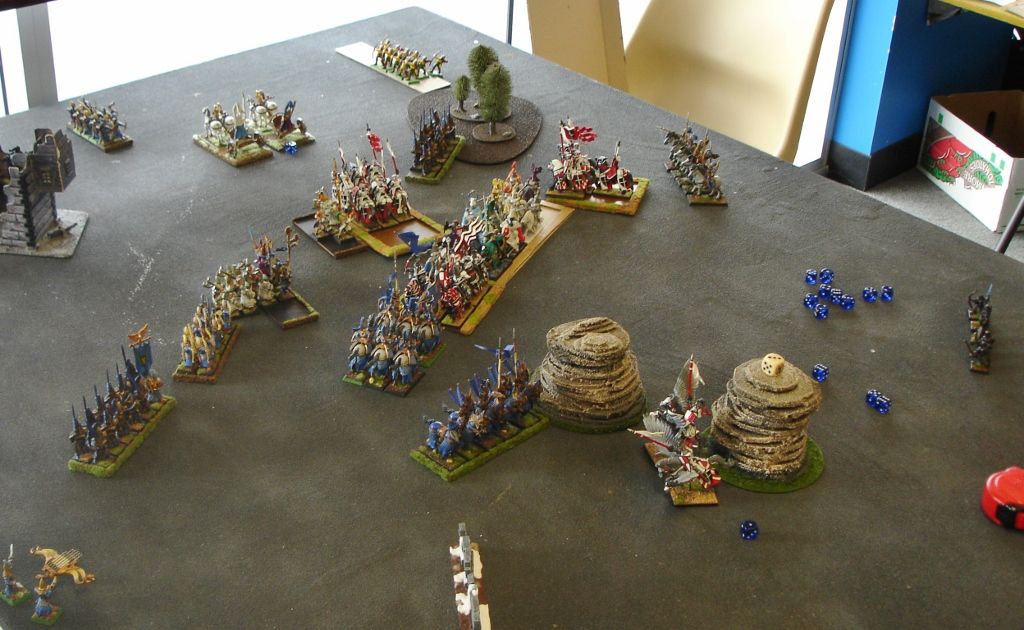 |
| Elves attack! |
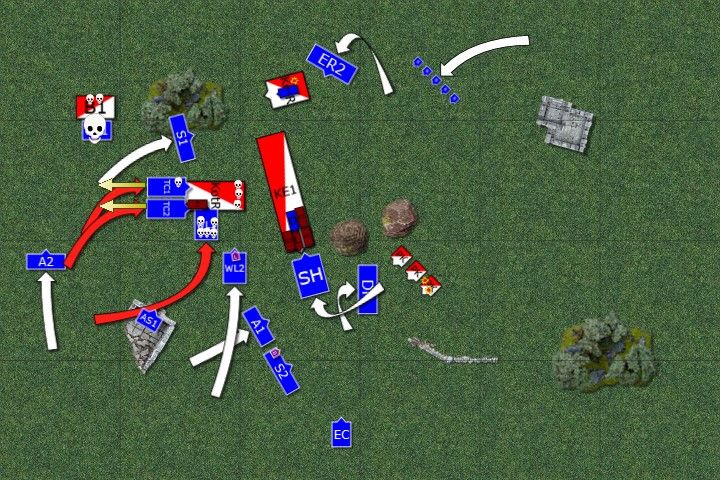 |
| Only to bounce back! |
Using the opportunity Elven units charge. Both chariots and White Lions storm into the smaller regiment of Bretonnian knights. But yet again their armour and devotion seem to be the best protection. Then Bretonnian paladin, like a savage beast from horrors, hacks left and right and only brave Chracians are stubborn enough to hold. Charioteers are forced to withdraw.
Peasant bowmen surprisingly finish off all the light cavalry and remain in their position. Finally, shooting claims one of the Pegasus knights.
Edit: I had to move Silver Helms as a blocker because Reavers failed their march test.
Bretonnia - Turn 3
 |
| Bretonnians keep attacking ... |
 |
| Trying to break through |
Peasant bowmen, getting brave, charge retreating chariots and force both of them to withdraw even further. Knights of the Realm fight against Lions and one Chracian remains to hold the line.
Silver Helms stand bravely against the full might of the bretonnian lance but stand no chance to hold. However, elven archers managed to destroy both Pegasus knights before they had a chance to strike! Surely these elves are Swordmasters in disguise!
Outcasts - Turn 4
 |
| Elves in relentless attack |
 |
| This time the attack is not stopped easily |
Larry the Loremaster leads his Lions to save their brave companion. Also reavers charge the rear of the knights and the units breaks only to be caught in pursuit by fast cavalry.
Swordmasters do not let another, already depleted, unit of knights to escape and capture the Prophetess herself. However, the lone survivor refuses to break.
On the Western flank the archers school bowmen in the art of archery. Only 2 most promising students make to the next level!
Bretonnia - Turn 4
 |
| There is only one left! |
 |
| Main unit of the Bretonnian army in a break through |
Bretonnian general, oblivious to what happens around him, charges another enemy in front of him and yet another elven unit is destroyed.
Single survivor of the prophetess bodyguard refuses to die again!
Outcasts - Turn 5
 |
| Elves do not engage |
 |
| Let them go |
Larry the Loremasters, seeing that not all of the units are in the position to attack and that the enemy is still too powerful, decided not to attack. Shooting and magic do not do enough damage but Swordmasters finally finish off the last stubborn knight of the realm.
Bretonnia - Turn 5
 |
| Last charge |
 |
| To freedom! |
Bretonnian lord has his last target in sight and his knights can only follow. Eagle claw is destroyed and bretonnian only regiment breaks through encirclement. Despite that Elves still claim the victory.
Summary
 |
| Turn-by-turn summary animation |
After-battle thoughts
As usual Bretonnian Knights prove very hard to defeat. The amount of arrows they simply deflected and amount of hits they didn't care about was enormous. But I knew that and tried to apply even more strength to the attacks.
In the end it worked enough to secure the victory. I think Richard played a little to my strengths as he moved through the middle of the battle field thus giving me the chance to go around his flanks. Even with some protection of the rocks it was not enough to prevent that. Then he started to react to my moves and lost impetus. I think it would have been harder for me to put up a decent fight if he turned to either of the flanks and tried to charge half of my force. I also wonder if spreading the characters more evenly among the units would have been a better idea?
Despite the fact I won there were a few mistakes that I should not have made.
First, the reavers and exposed flank of Swordmasters to the bowmen attack. It was good move to protect the flank but positioning should be at an angle so that overrun would not have led to the flank of the formation there. If reavers didn't hold I would have been in trouble.
I can't remember what number of impact hits I got but I think it was below the average. It was a good attack but with the powerful character it didn't go well. The good thing is that eventually I got this unit and it was also thanks to pinning it for long enough so that Larry could charge in himself.
But the most crucial mistake that robed me of the opportunity to attack the main enemy units was when I didn't position Swordmasters led by Bob and the chariot so that they could see that unit. Ideally, I wanted both Swordmaster units there but one stubborn knight held them too long.
I still don't know if that were enough to defeat that monstrous regiment but at least some of the characters would have been pinned and I could have directed many attacks at the unit.
A pity because I was very curious what it takes to defeat such a powerful regiment.
In the end I was very happy with the result (12.45 - 7.55) and even more so with the fact we had a great game!
Thanks for reading!
No comments:
Post a Comment