Game 3 - Blood and Glory - High Elves - Marc
In game 3 we played Blood and Glory scenario with the following modifications:
1. Breaking point is 3 fortitude points
2. Did you break the enemy? - 3BP
3. Was the winning army 1 point away from breaking itself? - 2 BP to the loser
4. Was the winning army 2 point away from breaking itself? - 1 BP to each player
5. Was the winning army 3 point away from breaking itself? - 2 BP to the winner
Apart from that all was as in the rulebook.
It was a very interesting match up as I had to play against another HE army. Before the new book it was always a pillow fight as none of the units had re-rolls and everybody hit at the same time. Now it was different as some units kept re-rolls against some and getting into combat with right units was crucial.
Marc had a HE army with striking, purple-pink color scheme, Mr. Frosty as a center piece and some nice Reavers conversions.
High Elves - Army List
Archmage, level 4, Talisman of Preservation - Lore of Beasts
BSB, Halberd, Armor of Caledor
Mage, level 1, Dispel Scroll - Lore of Heavens
30 Spearmen FC
10 Archers
5 Reavers bows, spears, musician
5 Reavers bows, spears, musician
23 Pheonix Guard FC
21 White Lions, Musician, Banner of World Dragon
5 Shadow Warriors
Frostheart Pheonix
Great Eagle
Great Eagle
Bolt Thrower
Bolt Thrower
Much tougher force, with some usual suspects but not all of them. I was curious if I would be able to do something about Frosty. I was also wondering what kind of combats would be favorable to me. I knew I had to avoid Spears and Guard with my own elite infantry. Spears and Guard can strike first, get re-rolls and simply butcher my small units. At the same time Sea Guard and Archers, if attacking from flanks, can grind even white lions given time.
There were a few support units and 2 bolt throwers that also had to be dealt with very quickly if I wanted to have a chance in that game. These regiments are perfect to interfere with my movement phase so it was crucial to win support units war and not to lose to many regiments of my own in the process.
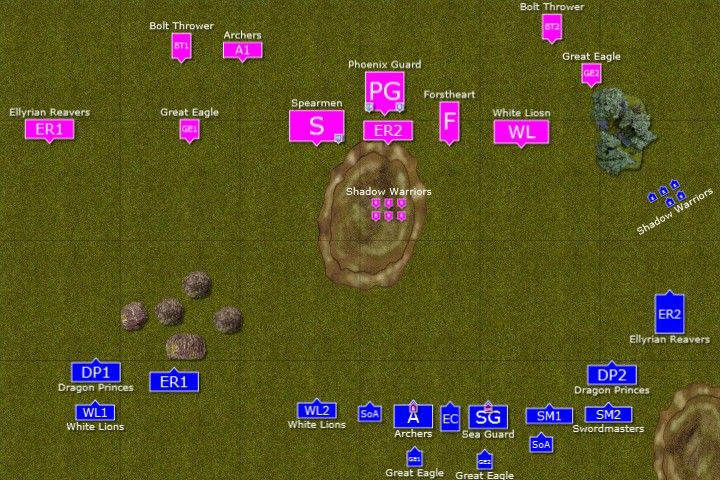
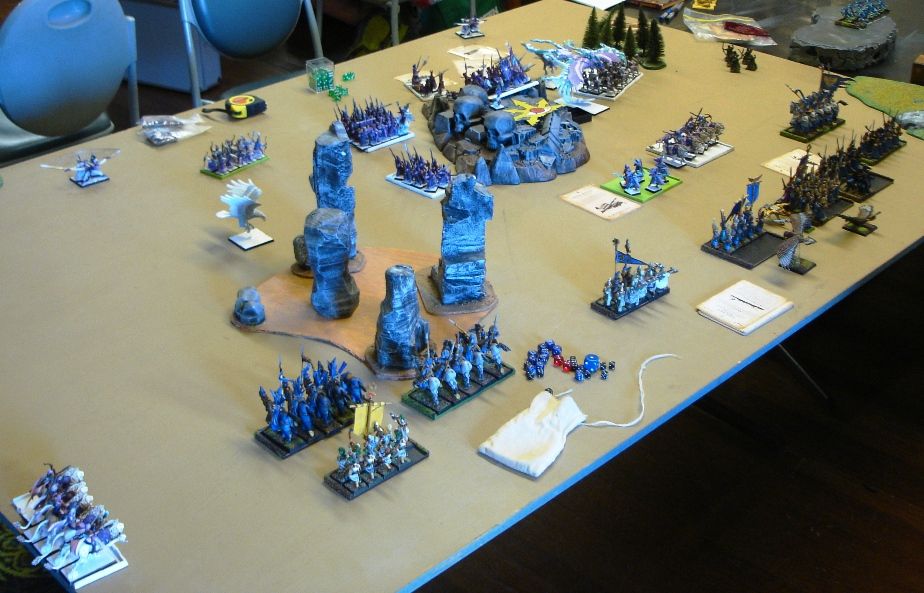
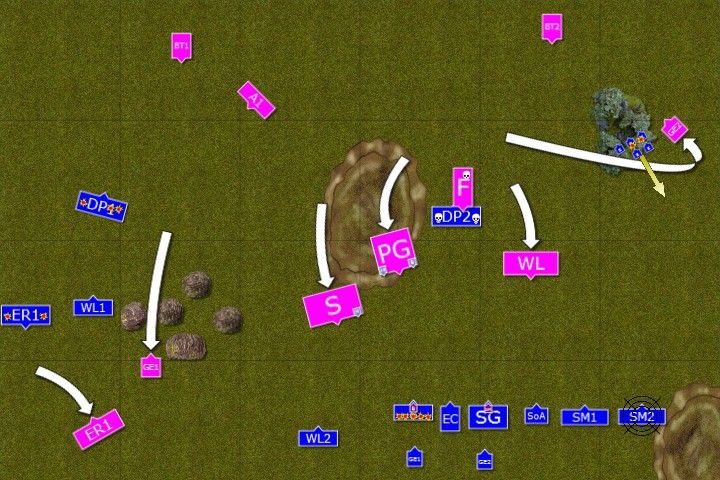
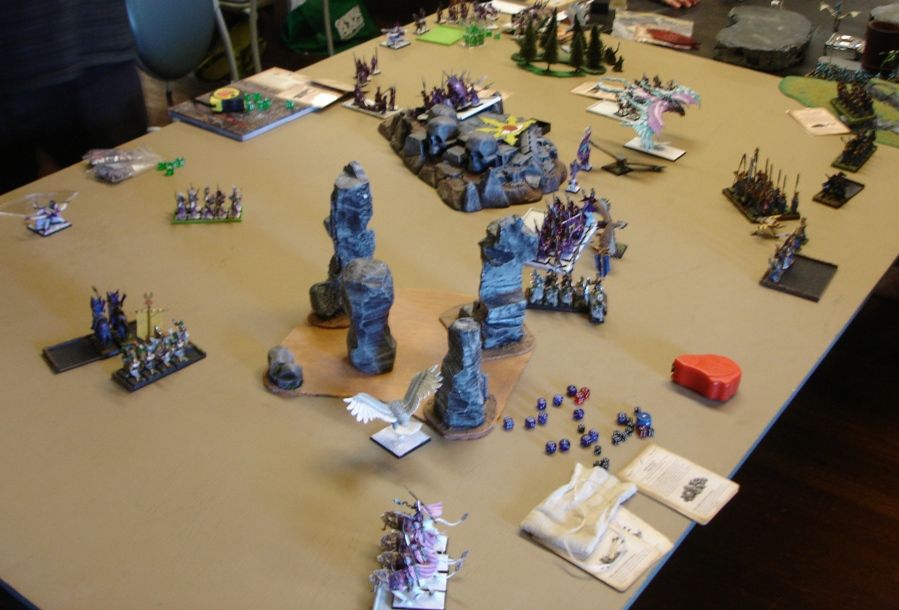
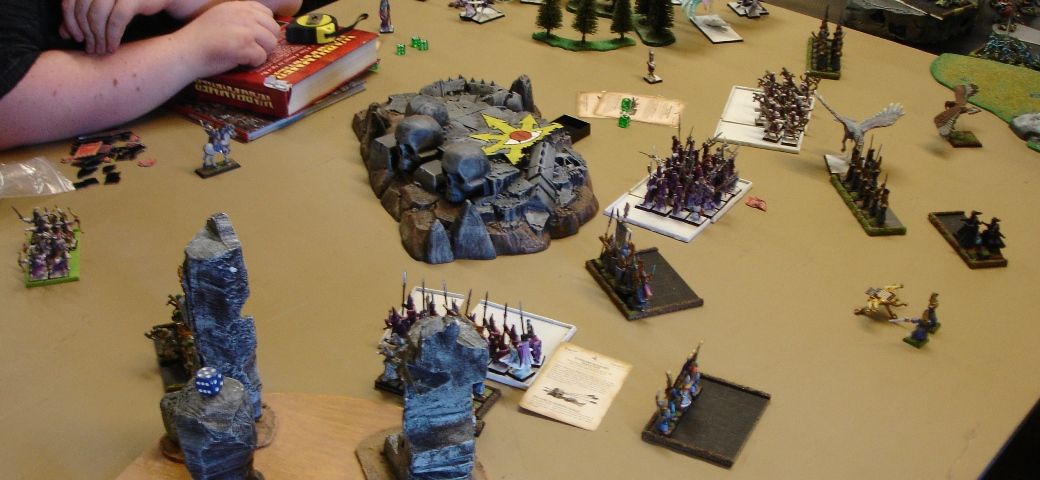
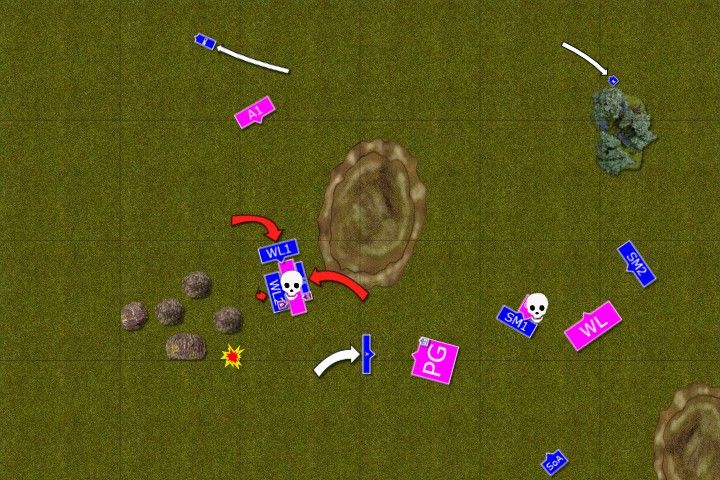
Deployment
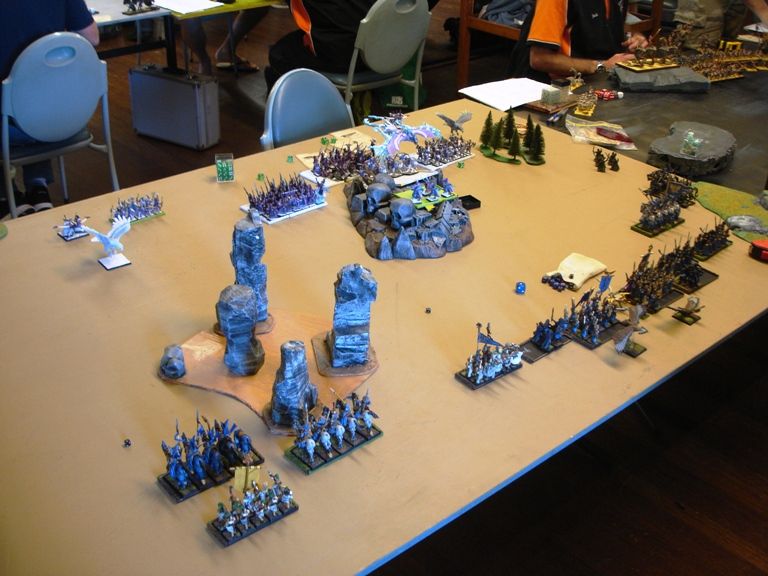 |
| Civil War about to begin |
 |
| Deployment of armies after vanguard |
Not surprisingly Marc deployed his army as forward as possible, using the opportunity given by the scenario. I decided to deploy a little further as I needed some more time to deal with light troops. I also reinforced flanks to be able to get to bolt throwers. I thought I might have a good match up with Swordmasters against Lions if I could send both units at the same time. Hitting on 3+ and having more attacks should give me an edge in that combat but if that happened it would be a bloody encounter anyway.
Marc's wizards had following spells:
Archmage - Wyssan's Wildform, The Flock of Doom, The Curse of Anraheir, Transformation of Kadon
Mage - Harmonic Convergence
Marc won the roll off and his was first turn.
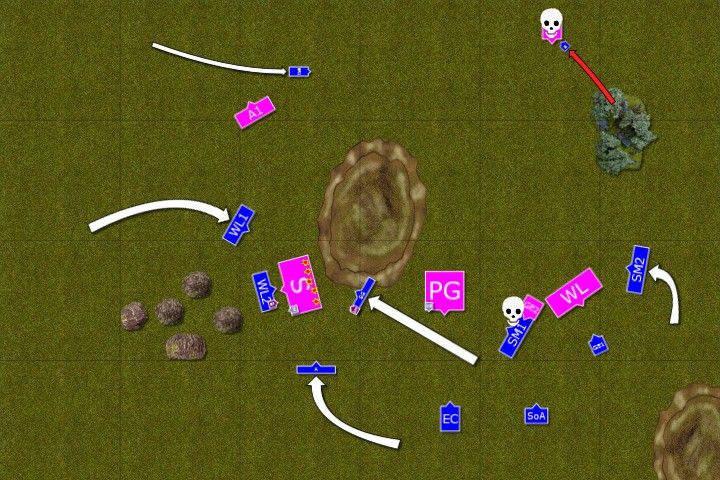
High Elves - Turn 1
 |
| Royal Elves move fast forward |
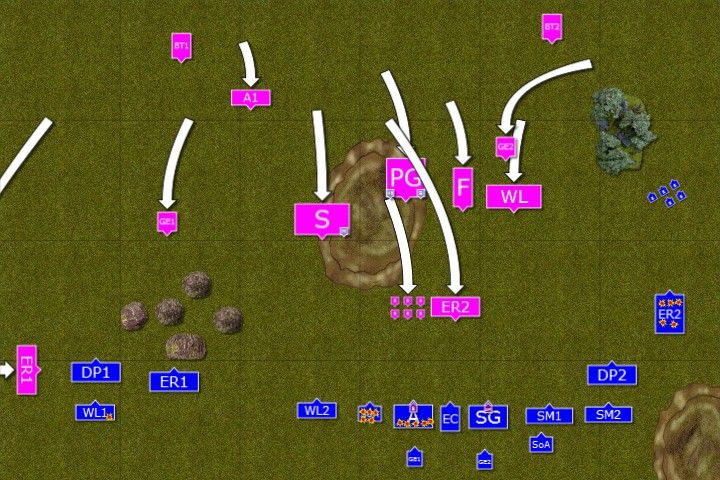 |
| Outcasts under pressure from the start |
Royal Elves wasted no time and used the opportunity of being deployed closer to the enemy. All units moved fast forward with light troops leading the way. The wizards also added their support to the army effort. Archmage cursed one unit of Swordmasters while Mage magically improved the accuracy of the bow fire coming from Shadow Warriors.
The the barrage of missiles of different size decimated one unit of Sisters and in an incredible display of accuracy, one of the eagle claws destroyed entire squadron of enemy fast cavalry with a single salvo!
A very strong start for royal Elves.
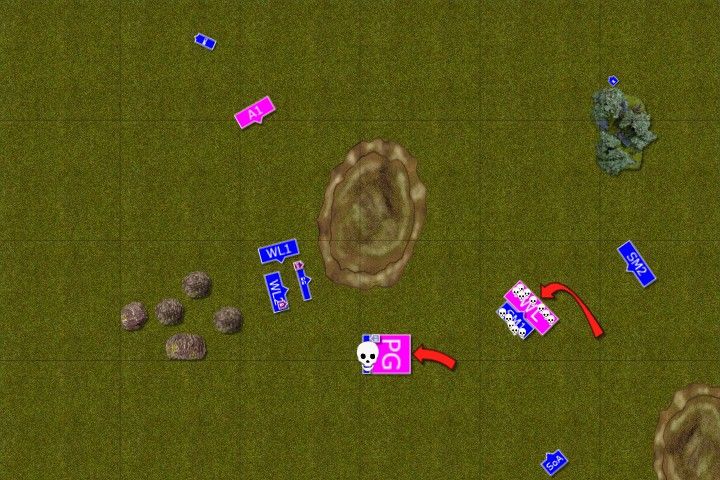
Outcasts - Turn 1
 |
| Outcasts hold their ground ... |
 |
| ... and try to counter attack |
Despite some significant losses right from the start Outcasts steeled themselves and tried to counter attack. Proud descendants of the dragon riders of the past aimed at Forstphoenix but quickly found out that their lances do not strike with usual accuracy nor the strength of the charge is appropriate. The combat continues.
Light troops on the flanks march fast forward to attack enemy bolt throwers at the earliest opportunity. Reavers on the West try to aim at their counterparts but their shots miss the target. Fortunately, the troops in the middle managed to destroy both light units of the enemy and cleared the field.
High Elves - Turn 2
 |
| Royal Elves tighten their grip |
 |
| Their shooting is still very accurate |
Royal Elves keep marching forward. Frostheart phoenix is locked in combat against heavy cavalry but 3 big infantry blocks have clear path towards the enemy battle line. Archmage once again curses the Swordmasters.
On the West Reavers unhorsed two enemy light cavalrymen and eagle claw crew, together with Archers, killed another 3 Dragon Princes. On the East Shadow Warriors suffered casualties and withdrew to the safety of the forest, while archers in the center were down to the third of their initial numbers.
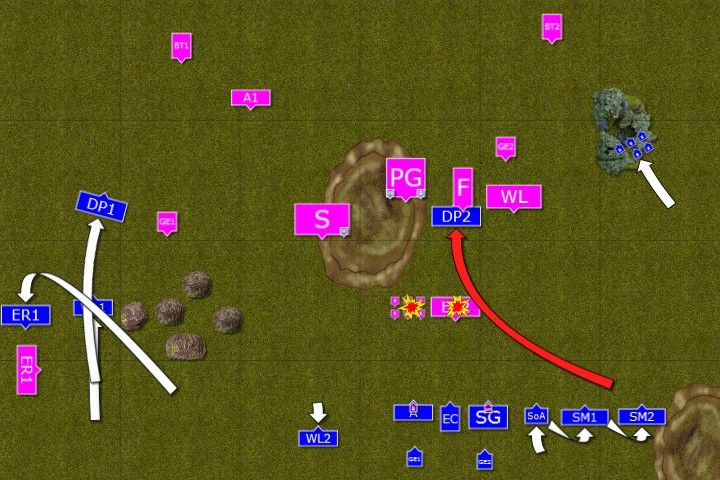
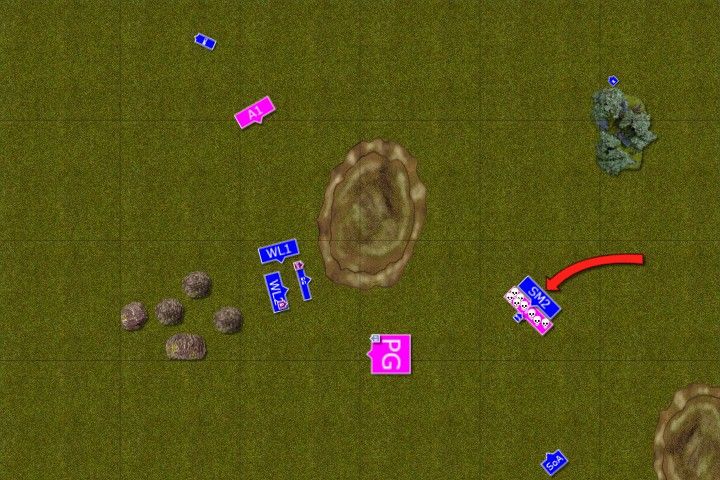
Outcasts - Turn 2
On the West Reavers unhorsed two enemy light cavalrymen and eagle claw crew, together with Archers, killed another 3 Dragon Princes. On the East Shadow Warriors suffered casualties and withdrew to the safety of the forest, while archers in the center were down to the third of their initial numbers.
Outcasts - Turn 2
 |
| Despite close proximity of Mr. Forsty it is getting hot in here! |
 |
| Outcasts begin their maneuver dance |
With close proximity of enemy troops Outcasts send in their light troops to divert and disorganize their foe's approach. Unfortunately, both heavy cavalry units fail this time. These fighting against Frostheart phoenix lose 2 and their standard bearer dies (Edit: a little unlucky to fail Ld8 test after losing combat by 1).
The unit on the Western flank fails to reach enemy bolt thrower and are sitting ducks in the open now. (Edit: Even more unlucky as I think I needed 5-6 to roll with swiftstride to reach the war machine)
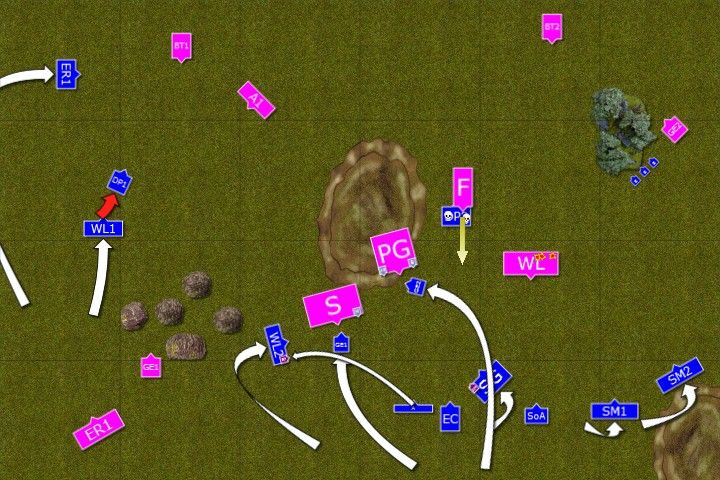
High Elves - Turn 3
 |
| Royal Elves charge! |
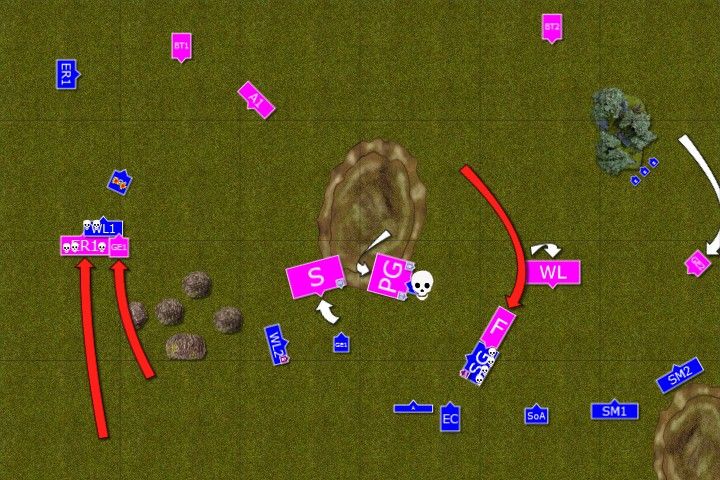 |
| Outcasts in big trouble |
Roayl Elves are now in position to charge. Frostheart, seeing exposed flank of enemy sea guard unit charges in. Steadfast outcasts hold their ground, however. Phoenix Guard quickly destroys blocking eagle.
On the West reavers and eagle charge White Lions but it backfires as they lost a few of their numbers and stubborn Chracians go nowhere. Dragon Princes, however, are shot to pieces. Only spears decided to pull back.
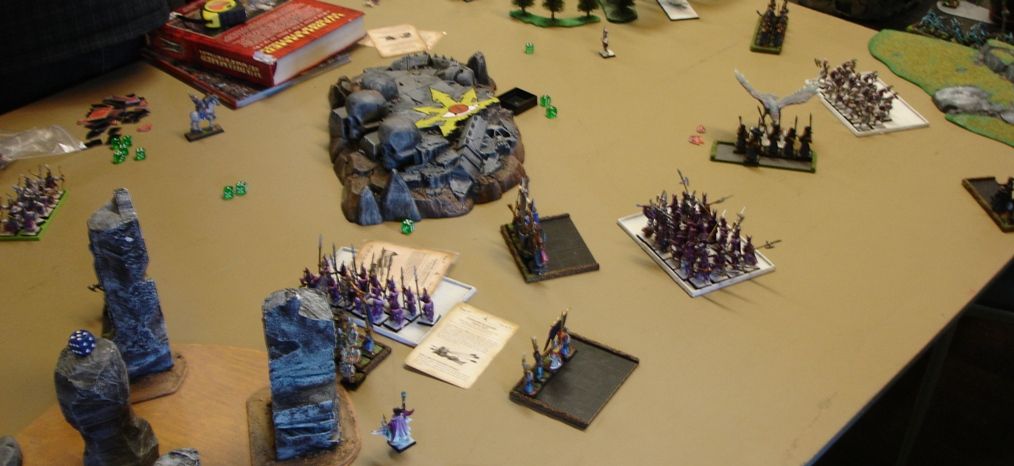
Outcasts - Turn 3
 |
| The armies locked in deadly combat |
 |
| Battle rages on few fronts |
Outcasts are hard pressed but keep fighting. Swordmasters, strengthened by Loremasters spell, charge Frostheart Phoenix and wound it. But the combat remains unresolved.
Nearby eagle blocks approaching Lions as Phoenix Guard is in the wrong position to support the Phoenix and attack any of the enemy units.
On the West Lions destroy both light troops of the enemy while Reavers charge and destroy bolt thrower, while Shadow Warriors renew their effort to capture the second one. Finally, another unit of Lions moves to the flank and the shooters aim at exposed spears to thin down their numbers.
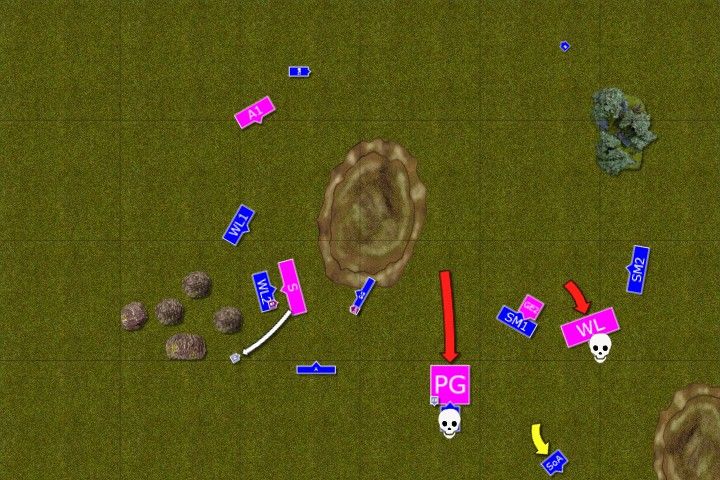
High Elves - Turn 4
 |
| Outcasts start breaking through! |
 |
| Royal Elves tried to swing the balance of the combat to their advantage |
Seeing an opening Royal BSB charges heroically into combat, supported by great eagle. However, Swordmasters break through cold and ice and finally destroy the Phoenix. They are not able to dispatch the eagle though. While warriors of Hoeth remain in the fight their effort allows the Loremaster and his few surviving bodyguards to escape to safety.
Spears reform to face the Lions while bolt thrower kills some more Shadow Warriors and only one of them survives but this time he is determine to enact vengeance upon war machine crew for killing his companions.
(Edit: I am not quite sure what was the story with Lions and Eagle as it seems it was charge and either fled from combat or somehow survived it and fled, sorry :()
Outcasts - Turn 4
 |
| Loremaster is free! |
 |
| Setting up the trap |
Larry the Loremaster leads his companions out of reach of enemy Phoenix Guard and closes in to attack exposed rear of the spears. Lions surround them too while shooters keep thinning them down.
Swordmasters killed enemy BSB but still could not get rid of an eagle. Lone shadow warrior successfully charged and destroyed another war machine.
High Elves - Turn 5
 |
| The battle enters final stage |
 |
| Royal elves attack secondary targets |
Phoenix Guard and White Lions charge respective targets and destroy them. These are, however, secondary ones as main units and characters of the enemy are out of reach.
Spears remain in place while Mage runs away before the inevitable combat erupts. Seeing this Archmage toughens his warriors with a spell that makes them stronger too.
Outcasts - Turn 5
 |
| Death of the spears regiment |
 |
| Trademark combined charge by Outcasts |
Three units and two characters charge as one. Spears fight bravely but cannot withstand such an assault and are run down in hot pursuit. Larry the Loremaster also manages to kill the enemy mage with his Death spell just before the combat started.
Swordmasters finally killed an eagle and had to prepare themselves to receive Lions charge.
High Elves - Turn 6
 |
| Last attacks by Royal Elves |
Phoenix Guard charged the Archers and destroyed them after short combat. Lions found themselves well matched. In fact, Swordmasters counter attacked with such ferocity that it was Lions regiment that had to steel themselves and keep fighting! But the price was high and only a bladelord remained against whole Lions unit. Fortunately, his companions from the second regiment were coming to his aid.
Outcasts - Turn 6
 |
| Charge of the Swordmasters! |
There was only one fight remaining and all eyes were turned towards deadly contest between Lions and Swordmasters. Would stubbornness and ferocity prevail or was the centuries of rigorous training to make a difference?
As it turned out Swordmasters killed all but one Lion and only thanks to the fact he held his standard high that Royal Elves were not broken.
Seeing this, the Archmage gave the signal for withdraw. Surprisingly, Outcasts carried the day!
Summary
 |
| Turn-by-turn summary animation |
After-battle thoughts
After turn 2 I thought I am going down. Marc's shooting was devastating and despite my advantage in the fast units department I was losing the war of support regiments.
His army was going fast and choked mine in the corner - a sign that I deployed badly and that I was not acting decisively. When Frostheart broke my heavy cavalry in my turn I though I am very, very dead.
But a few things happened that allowed me to claw my way back and even win the game in the end.
First of all I think that if Marc sent his units supported by each other I would have been in much more serious trouble. Frostheart is tough but it seems that his few attacks and random t-stomp may not be enough to kill even small infantry fast enough. I thought that the charge against it with heavy cavalry was a mistake but if not for that blunder with Ld test I was actually pleased with the fact it was pinned down for a while. Having said that, it is quite possible I should have move them to the flank instead and threaten Lions.
Marc pointed out that it was a mistake on his part not to attack an eagle with his spears. I think he is correct. It would bring his unit closer to my main regiments and I was running out of re-directors. In general, spears were quite passive. I expected a charge against Lions with BSB simply to thin them down if not kill them eventually. Instead, they waited to be surrounded and destroyed.
I also think it helped me that fast units were either exposed early or attacked flanking units. Thanks to that my own eagles were safe and could have been used when I wanted to. I also destroyed these regiments and got to the war machines, despite very heavy losses at the beginning. If these fast units were kept in reserve they would have engage my own units and isolate combats better.
Edit: Marc had doubts about war machines losing combats, so here is the relevant passage in the rulebook that we should have checked during the game:
page 110, War Machines in Close Combat, last paragraph, last sentence:
If the war machine loses the combat and fails its Break test it is destroyed.
Another thing was how Phoenix Guard moved. For example, after killing the eagle they faced in the direction where they could not support Frosty. After that, a lone charge of a BSB against Swordmasters was risky and he lost his life. Next, PG charged eagle claw instead of Swordmasters who were already at half strength. Or they could reform and chase my Loremaster.
Finally, Lions seemed to be a little indecisive. They attacked Swordmasters, probably not the best target and suffered badly. It was quite lucky that Marc didn't lose that unit as it would make my win even bigger. But despite that I am still very happy with the victory.
Especially that I was very passive and indecisive too. I should have been more aggressive with Swordmasters and try to engage Lions earlier. I was not sure who might be better in such combat but now I know that it favors Swordmasters. Even if I lost one unit I should be able to grind the Lions down and in the end they are more expensive unit as well as it allows to get to the breaking point.
After adding all the bonus points and comp difference I got 15.5 : 4.5 win and found myself 3rd after day 1. It was totally unexpected and I knew that day 2 will be very, very hard as I was about to compete against top players.
Despite this loss Marc won his other games decisively and got best HE player award, so congratulations, well done!
Oh, and if you ever wondered, MSU is under rated :)
Cheers!
That was a nail bitter!
ReplyDeleteImpressive come from behind on your part. I'm wondering if charging the frost heart was a mistake or not? It's an interesting situation that merits some thought. My thinking is this:
1. MSU has a hard time with flying monsters due to an inability to redirect them reliably and t-stomps (while random) can wildly swing a combat.
2. MSU is relies on out-maneuvering your opponent. It is difficult to out-maneuver a flier. Not impossible, but it requires restricting landing space which takes effort from multiple units which reduces their efficiency.
3. So "pinning" a flying monster with heavy cav maybe the way to go. The high armour save mitigates losses and being cav removes the thunder stomp threat.
4. The opponent either must commit another unit to the fight which helps divide the army or let the monster get stuck in or hang back and keep the battle line in order.
5. This tactic gave you time to reposition your important pieces out of harms way and left his two pricey blocks of PG and WL to collect very small victory point units which freed you up to get rid of everything else.
I'm thinking small units of heavy cav might be an interesting answer to the "frost heart problem". Shooting and magic are options but not as reliable as close combat. Definitely something to think about.
I believe it was a good decision because every turn Frosty does not fly anywhere is good for me. I didn't count on breaking it on the charge (too close too BSB) but in general it is an option. Risky but an option nonetheless. Let me address the points you made:
Delete1. Very true. In fact, monsters alone seem to be more dangerous than ridden ones because I cannot challenge them thus preventing the monster from using t-stomps and being steadfast for that one turn. Because of that I need to have the positions very tight and precise so that potential pursuits/overruns do not lead into fresh enemy.
2. Extremely important too and the reason why nowadays proliferation of flying characters and units is so difficult to counter. One of the ideas I have is to approach the enemy in two lines, with cavalry leading the way and infantry guarding their backs and denying safe landing zones. However, that works if I can defeat the flier(s) with infantry which may not be the case.
3. Yes, these were the reasons that made me decide to attack Frosty with Dragon Princes.
4. Correct provided there are few flying monsters in the army. I played against the army with 2 Flamespyre Phoniexes and an Annointed on Phoenix or Stardragon + BSB on Griffon + Frosty and I must say it was tough :)
5. The fact that my opponent had infantry based army and single Frosty helped here.
From my experience so far it is always the combination of things that will work against monsters like Frostheart. I have to wound them with something and then can push in combat. The option might be to sacrifice some units that can still hurt it in a fight and finish it off with ranged attacks. I was thinking about getting one more cavalry unit in the form of Silver Helms.
However, with the unknown future of Warhammer I need to be careful how I commit with my time resources in particular as I would need to paint some more miniatures to get to the point where I can have my army equipped with more knights.
Thanks again for great feedback!